
Hello friends! Happy Hump Day :) Its been a crazy few days but I have a treat for you today. I entered this contest given by The Beauty Department, you had to create a hairstyle that was original, creative and most of all easy. It was a challenge at first but once I started playing with my hair I came up with great tutorial that I ABSOLUTELY LOVE! It gets all the hair out of my face and off my neck which is a total plus in this TX heat. It's my take on a swiss miss braid.....I call it the TWISTED SWISSTER. I hope this tutorial is as easy for you as it was for me.
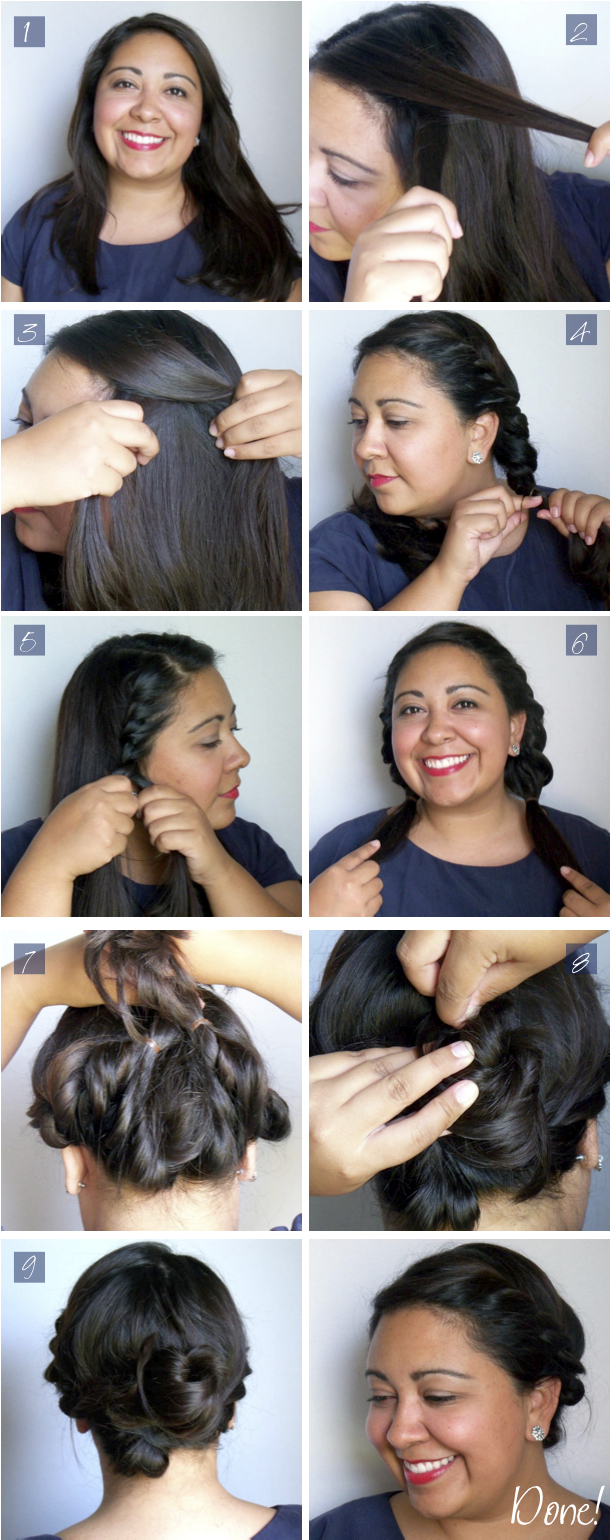
2. Start with one section of hair. Take two pieces of hair near the front of your face and criss cross one over the other.
3. Once the hair is crossed add a little more hair to each piece and criss cross again.
4. Keep repeating this step until your hair reaches the nape of your neck. Don't forget to add hair to each criss cross you make. Tie off this twisted section with a rubber band.
5. Repeat the criss cross motion on the opposite section of hair and tie off with a rubber band.
6. You will end up with two twisted braids.
7. Gather the end of both braids and twist into a side bun.
8. Pin the bun into place. Add bobby pins wherever needed.
9. Spray hair lightly with hairspray for extra hold. Rock that TWISTED SWISSTER!
The best part of this hairstyle is that you can wear it many different ways. Grab the ends of the braids and put them into a ponytail or grab the ends and tuck them into the sides of your hair. The possibilities are endless!! Have a fabulous rest of the week with even more fabulous hair!

0 comments :
Post a Comment