

Welcome to my last tutorial tuesday, I am so excited about this one. Since our theme this tuesday is spring, i decided to do one of the most popular spring trends, a turban headband! I'm doing 3 styles, a bow turban, knot turban, and a hole turban. They look better then they sound trust me...
Hole Turban
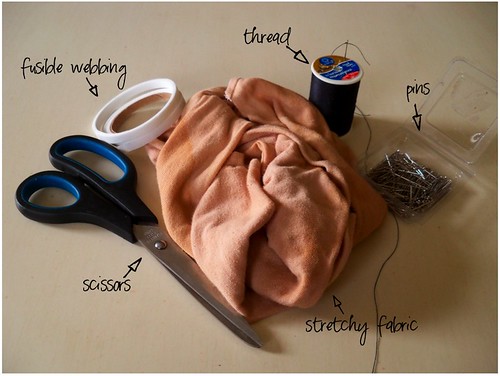
This particular turban has a hole in the middle, hence the name hole turban, sorry my creative juices weren't really flowing when i named it. I used a stretchy headband i already had, i just cut it in half, but if you have any sort of stretchy fabric you can use that too.
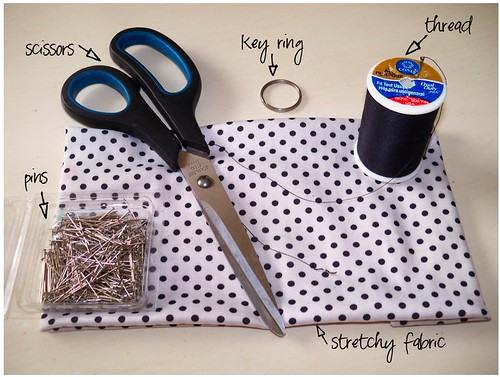
Step 1- cut your headband in half, or if your using stretchy fabric cut it to make a long strip. If your using a fabric, you'll need to sew it so you don't see the raw edges (i use fusible webbing, it's really easy)
Step 2- Take the first end of the fabric and feed it through the key ring, spread the fabric out so half the key ring is covered. Pin it in place. Then do the same to the other side of the key ring with the other side of fabric.
Step 3- Now your ready to sew the fabric around the key ring, make sure to only sew through one layer of fabric (you don't want the thread to show on the fabric in the front of your headband). It's much easier if you pinch the two pieces of fabric your sewing together, it'll act as a guide.
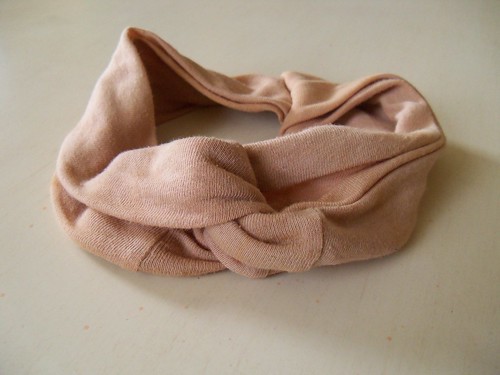
Step 4- Once you've sewed the fabric around the key ring, you can take the pins out!
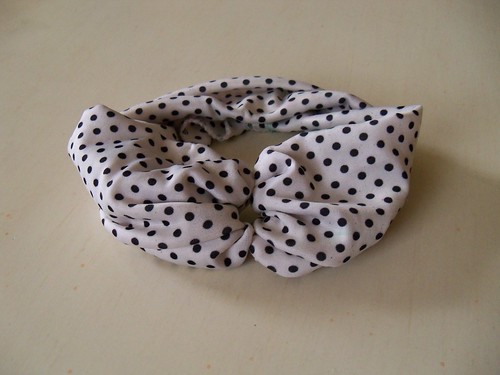
It's now ready to wear.....Here's how mine came out....
Bow Turban
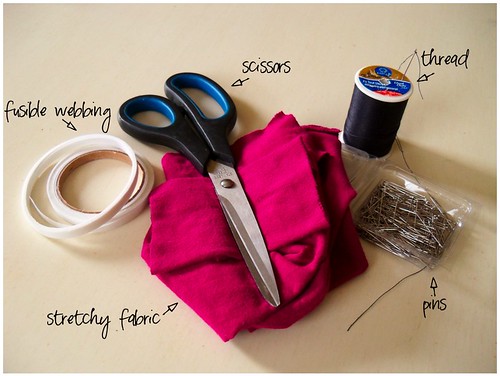
The next turban is super cute, i really love it! I just used an old camisole. If you have a old shirt that has stretchy fabric you could use that too, or if you want to use a stretchy fabric thats good too!
Bow Turban
The next turban is super cute, i really love it! I just used an old camisole. If you have a old shirt that has stretchy fabric you could use that too, or if you want to use a stretchy fabric thats good too!
Step 1- cut a big section of your cami (side to side) or if your using fabric just cut it like in the hole turban. Next if your using a cami, cut where the seam was to hold the shirt together, you should now have a long strip.
Step 2- Now you'll need to either sew or use the fusible webbing to bring the two raw sides together. I recommend using the fusible webbing, all you need is an iron. You'll need to do it inside out (sewing or using fusible webbing) and then just turn it right side out when it's together.
Step 3- After the two raw sides are together you should have one long strip. There should be a seam left in the middle (if you use a cami) If there's not don't worry. Now you'll want to get your needle and thread ready. Weave the needle and thread either on the seam or just in the middle of the strip.
Step 4- Once the needle is weaved all the way through the fabric, pull it taught. It should look scrunched.
Step 5- Now determine how tight your turban should be, then cut it to the desired length, and sew the two ends together.
Now it's done! Here's mine.....
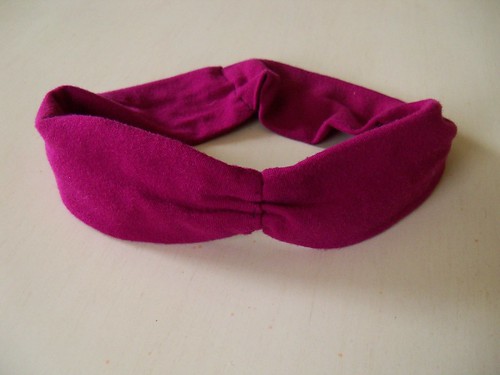
Doesn't it sorta look like a bow in the front, hence the name!
Knot Turban
This turban looks the most traditional, and is probably the easiest.
Step 1- Follow Step 1 and Step 2 in the bow turban. except double it. You'll need two long strips.
Step 2- After the two raw sides of the two strips are together you should have two long strips.
Step 3- Now take the two long strips and make them into a cross.
Step 4- Fold one side over to the other making sure the other strip is hooked in between the other strip.
Step 5- Now Fold the other side over, and it should look like a knot in the middle.
Step 6- Now determine how tight your turban should be, then cut it to the desired length, and sew the four ends together.
Dunzo! Here's mine.....
Phew....we made it! All three are done, Now go rock your turban!
I will try to post pics of me actually wearing the turbans tomorrow, i've just been so busy making 3 turbans and all :)

1 comments :
I'm truly enjoying the design and layout of your blog.
It's a very easy on the eyes which makes it much more pleasant for me to come here and visit more
often. Did you hire out a developer to create your theme?
Outstanding work!
my homepage ... payday lenders (comercioeletronico.org.br)
Post a Comment